Sunday 9 September 2012

Just Add Caulk for a 3Dimensionl OoOoh La LAAaa

PLEASE share this responsibly. It was a lot of hard work. And it's a really cruddy feeling to see my work on the net with the logo missing or no credit back. Pretty please just give credit to all of us hardworking women and share and pin responsibly  :) 

Merci Beaucoup!

Now, before you scrunch your nose up, yes...... it's caulking.

After the bathroom reno and a LOT of caulking boo boo's, I realized that caulking can be amazingly manipulated! With some patience and lots of test gobbers first!

I considered writing the manufacturers and discussing the idea of making a mixture that would dry faster and harder for the DIY crafters out there, but then I read their legal disclaimer.

The jist of that is .... Anything you submit to them via E-mail, becomes their property. Including any ideas be it  marketing, manufacturing, advertising etc.

Basically, if they weren't up for giving me credit for the idea, I'd just give my self credit and show it off  to the DIY world and well... let you all be DIY'ers.


So here is the project.

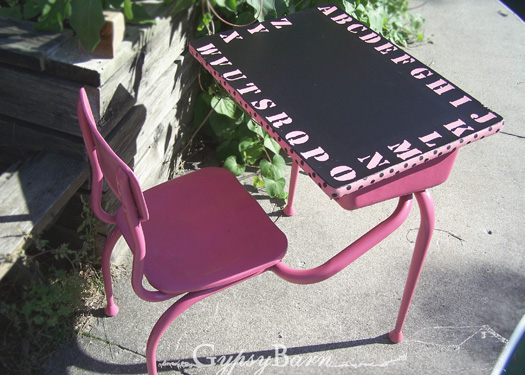
 The Before. Sad, scratched, Dinged up, missing knob and crank. Pretty sure it was a Radio Box back in the day. The only thing I could see were those legs! Oh my heart swoons over legs!


The After.

 Now let's look at the step by steps shall we?

Step 1 - Strip that baby down!!!!

Add some Caulking. Be creative, make swirls and loops and layers. The more the merrier!

Of course it's going to look sad, until you play with it and paint it. I found letting it sit for 10 minutes, then wetting your hands and molding it worked great!


Add your lettering or designs in whatever means you are most comfortable with.


I chose to line it with a sheer curtain. I love the look it ended up with!

I left the bottom unattached just in case it's new owner wanted to use it as a hiding spot.


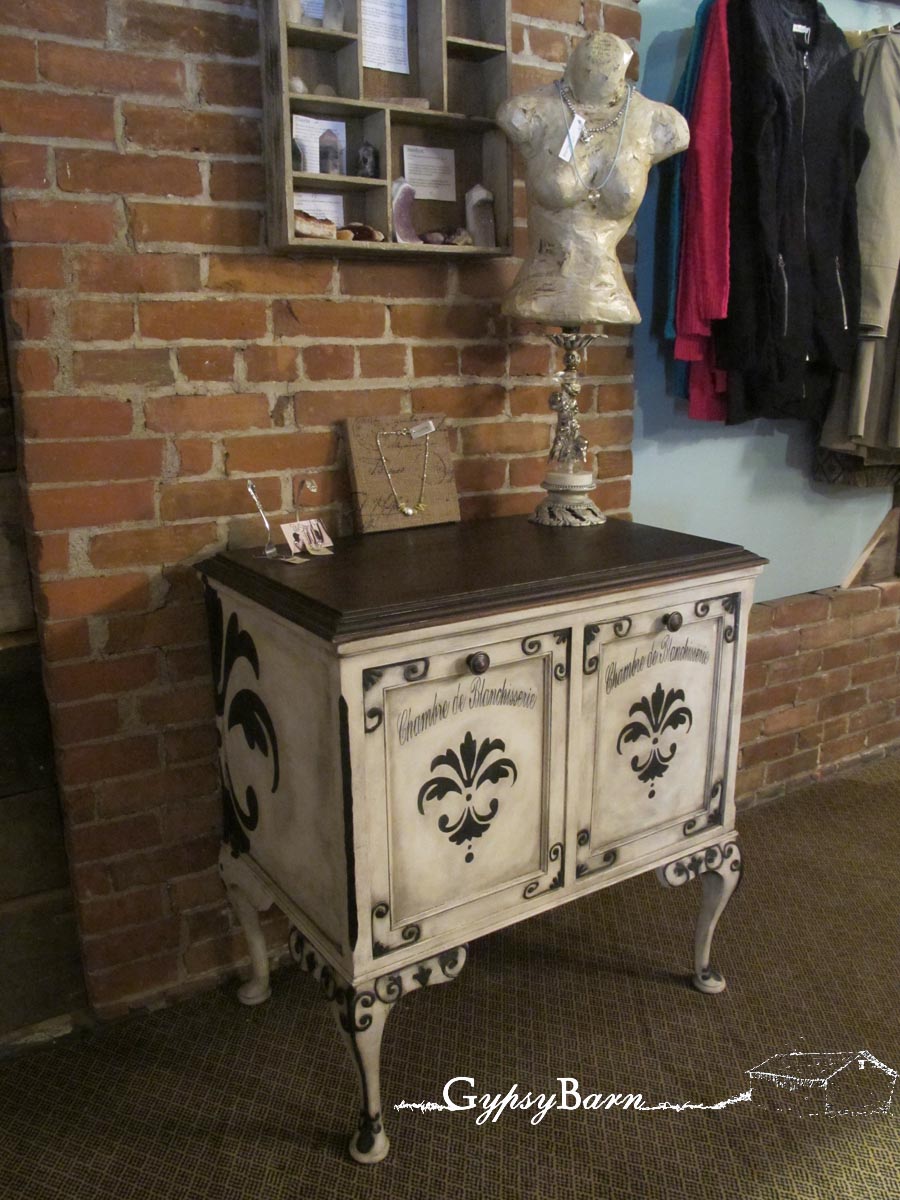
The after. After a LOT of waxing. The waxing on this took me about 10 hours. Of course, that was with a break or 10.


And here she is. All finished. A few people stopped in while I was working on the final steps. They had been here many times before and all had seen this sitting in my to-do room. But NONE of them recognized it. They thought I had picked up some new little french piece. The caulking worked! It was very 3 dimensional and gave it such a boost! She was purchased 3 hours after I posted her for sale on my facebook page. And her new owner came from 2 hours away to grab her up! Pretty impressive!

Now ... I have to rethink what I am going to use for my laundry room hamper now. Hmmmmm ..... new project coming up I guess!

Come follow  us on Facebook :) I don't get a lot of time to sit and write, but I do post everything I do with info on it and links to it's features on other sites as they appear!
Can't wait to "meet you"

Cheers!

Jasmin


Thursday 16 August 2012

$148.00 Bathroom Makeover

Here it is!
Sadly, we didn't have the before pictures we thought we had, so we had to go with the only one we could find. It's not a great shot, but you get the jist right? HID-EEEEE-OUS !!!!

Keep in my that I am 110% junker by professional choice, so the decor in the shots are things I have around the house and use in re-purposing projects or for sale on my website. (sadly no I don't ship .. yet)

So here is the dreadful before shot!


And Here are the after shots. The progress photos will be added below.
And HUGE thank you to Glimpse Imaging.ca
for helping me decorate and do the photos!


Now, hopefully we have caught your attention to see all the in between involved!

Basically, you know the beginning stages, 
GUT, DEMO, DESTROY!

And then of course, patch up any holes with some drywall mud and sand them down nice and smooth.

Now for the fun part.

The "panels" on the walls were created by cutting down to size some mirror backings.
Or sign backings, picture backings, even dresser backings would work!
As long as it is thin.
I'm sure if you had some old lathe from some plaster walls,
they could be cleaned up and used for a thicker look.
We're contemplating that for the downstairs "closet bathroom"
So here we go - 
Step 1 after walls are fixed and primed......
add your strips of panel.


Now, here are the shots side by side, so you can see that that is indeed what I used.
I cut them on a table saw and used a little glue and a nail gun to attach them to the wall.
Expense #1 - Nails and Glue. - $10.00


I then made sure to caulk the exposed edges of allllllllllllllllllllllllllllll the trim. 
This is a crucial step. 
This is being done in a bathroomm - which means a lot of moisture, 
and this board would suck that right up and warp. So seal any exposed edge!
Caulk - $4.00


Now, you get yourself a mighty fine manicure between all the primer, paint and caulking.
I think a Free DIY sexy manicure like this should knock the expense list down shouldnt it?


Next step. Prime with a GOOD primer, especially in bathrooms and then paint!
Now if you are like me, which most well planned people aren't, you will paint half the room bright yellow, sit back and look at it, then go nahhhhhhhhhhhh and choose a new colour!
I chose grey.
It was a can that has been laying around here forever waiting to find a use.
I never pay for paint that I use in my home renos. I always take other peoples left overs.
No need to throw it the landfill or any other means, I can use it somewhere!
P.s. I had to include this shot.  
When painting over the door, the back of the door hanger makes an 
excellent extra set of hands to hold the paint can!


The mirror in the picture - well, it came from a dresser that was on the side of the road. 
I just painted it the same white I used on the bottom half of the bathroom!

Voila!
Yes ... that's it.

It's not as big of a job as you would think.
I did this in 4 days - while on bed rest for pneumonia!
I laughed at the doctor when he said - GO GET REST!
I'm sure it will come back and kick me in the butt again ... but at least my bathroom is done!

Now, where did the other $134.00 expense come from you ask?

Floor, Sink, Toilet, light fixture.
Let me just say this - 
If you see any store - and I mean ANY store with a Going out of  Business sale
or a Moving Sale
Ask them for their floor model demos!
I don't want to tell you how much we didnt pay for the sink and toilet ....
because, well, I don't want to make you jealous! HA! But it was a friggin steal!
Ask for demos, ask for bundled discounts and open box deals!
They will never tell you.... you have to ask!
The floor and light fixture were just some little quickie yardsale pickups. I haven't decided on permanent flooring yet, so this will do for now!
And that is that in a nut shell!
I'm sure you have a lot of questions, but I hope not.
But I have 11 more rooms to redo ... all looking as bad as that ...... so a lot more to come!
And when I'm not *ill* 
I will take more pictures as I go. But this was a full steam ahead, just get it done and relax project!

 One Last Peek!


*In Hind Sight, painting the strip before you put them on the wall is MUCH more intelligent and time saving!
I blame medicine head for not letting me do that. But still CAULK!


Until next time!

Tuesday 14 August 2012

Before Blogging


Before I learned about the blogging world, I didn't see any relevance in taking "progress photos"
I was more so in a mad rush to get the after pictures posted up for sale.

Recently, I have come to discover that I get far more enjoyment from teaching women
how to do these things, more so than simply selling them.

Enter: World of Blogging!

So, here is a small collection of a few before and afters from the earlier days.

The Little Cubby, Bubby.
She sold quickly! And why not? Super Cute!


The little French Chocolate Table. Graphics care of the Graphics Fairy


This was a custom order for a customer looking for something cute to be used at the bottom of her stairwell, so we dubbed her the Landing Table.
She had a total overhaul with some fabulous new Glass knobs and Pulls.


Saved! No one thought this was do-able!
So she got a beautiful blue with a tobacco glaze. 
Again, I didn't realize the importance of closeups then either.
*tsk tsk*


I honestly had no idea what I was going to do with this piece when it came in!
And then, Ooh La La Furniture decided to host a Facebook group dedicated to
Painting things pink to raise money for Breast Cancer!
This was our contribution to the cause and she was then auctioned off!


And of course, one of my personal favorites! The Rustic Triplets bench made from bits and pieces we pulled from a Barn Demo that we were called in to help with! Such a great piece! That would be the bottom of two chairs and the top of a third.


And that my dear friends is a little collection of things gone by. All have found new homes and I just keep on creating! I have quite a bit more to come to the Blog World as I get time to sit and write. However, I find it very, very difficult to sit still for too long, so crossing my fingers, they make their way over here!

Until then, come view the albums on Gypsy Barns Facebook Page


Cheers!
From DIY GRRRRRRRRRRRRRL
Jasmin of
Gypsy Barn!

Monday 13 August 2012

One Wild Martini Table

This will become more and more clear as I continue uploading all my past creations 
to the wonderful world of blog, but I have this sort of  
White Knight Syndrome for Beautiful Junk!


True Story!
see....


However, well worth the stop!
Moving Forward,  witness exhibit A of the White Knight Syndrome!


Just covered in scratches, gouges, holes, chips and dings.
Not to mention, that paint job made him look sooooooo sad!
There was no way I could leave him looking so .... well, pitiful.


So, first things first,  he received a nice fix up job with some plaster 
and then a lot of sanding to smooth him out.


Next up was a shiny new coat!
It was a tough call to go between a flat or metallic finish, but in the end, 
I decided he needed to look sleek!
Rustoleum to the rescue!

And last but not least, a fancy shmancy new glass top to add to the glisten!


And there you have it!
Sitting pretty in the sun!
The most low maintenance animal I have ever owned!
And ....... it serves up a mean martini, therefor bumping it up to the best pet ever!


Stop by Facebook and see all the albums of projects that will eventually make their way over to this blog!


Friday 20 July 2012

Sleigh Bed Gypsy Barn style!

The most YOU-Nique Sleigh Bed we could think of!

Well, here goes Blog attempt #2!

This beauty was discovered at an Estate Sale we just happened to stumble across.
There were quite a few sleighs there, in excellent condition, however, at the very end sat this little girl giving me the puppy dog eyes.


This particular one was from William Gray and Sons Carriage Company
circa 1903 - Chattham Ontario


Yup. She was looking pretty beat up.

Here is a nice shot of the boards that used to be the inner base.
Complete Rot.


The boards just crumbled away if you looked at them wrong ...
I tore the entire thing apart right down to the bare minimum that I could handle for a
repurposing project.

I then replaced them with some barn boards from a demolition we helped with.
Might as well try and keep the aged woods somewhat similar.

 I added some Elmers Wood Rot Stabilizer and some wood conditioner to the frame underneath the boards.
 Multiple layers of treatments left to soak it in for a few days.


Then, I tried the best I could to re-use some nails from the beams and boards we salvaged from this old barn that we were fortunate enough to pick from before it was flattened.


So FUN!
The sleigh threw me a little attitude and decided to eat my hammer.

After the boards were all replaced and everything was treated
I called in my dear friends Mother.

She likes to sew.
I do not.

It requires my having to sit still for along period of time, and well, that doesn't happen.
Ever.

She was cussin' me to make sure I didn't get her face in any of the photos haha


So here's a little compilation.
Sorry Judy, it made the cut!
You look fabulous!

She did the entire process by hand. I love it! I think it adds to the integrity of it all.
It took quite some time to choose this fabric. I think it was the right choice.
It still holds the antique look but it is ohhhhhhh so soft!

After all was said and done, I used Min Waxes PolyShades -Black Satin
and as fast I could, rubbed it on and wiped it right back off.
It really pulled that dull sunfaded pink back to red and really made it pop!

Here my dear friends are the after shots!


Lexy and I decided that it needed to be put to the comfort test! So we took a minute to enjoy it. My darling Hubby grabbed the camera and started shooting..... then I hear him say - " I'm assuming you want me to make sure the camera is angled enough so no double chins are showing?" THAT is why he is MINE! HA!!!


The final before and after

On to the next creation!


EDIT - AUGUST 2 - 2012

WOW! What an honour! The lounger was chosen by Minwax for the project of the month! Given all the entries that were out of this world, that is VERY flattering!!!